Archiv der Kategorie: IT

3D Printer auto leveling print bed

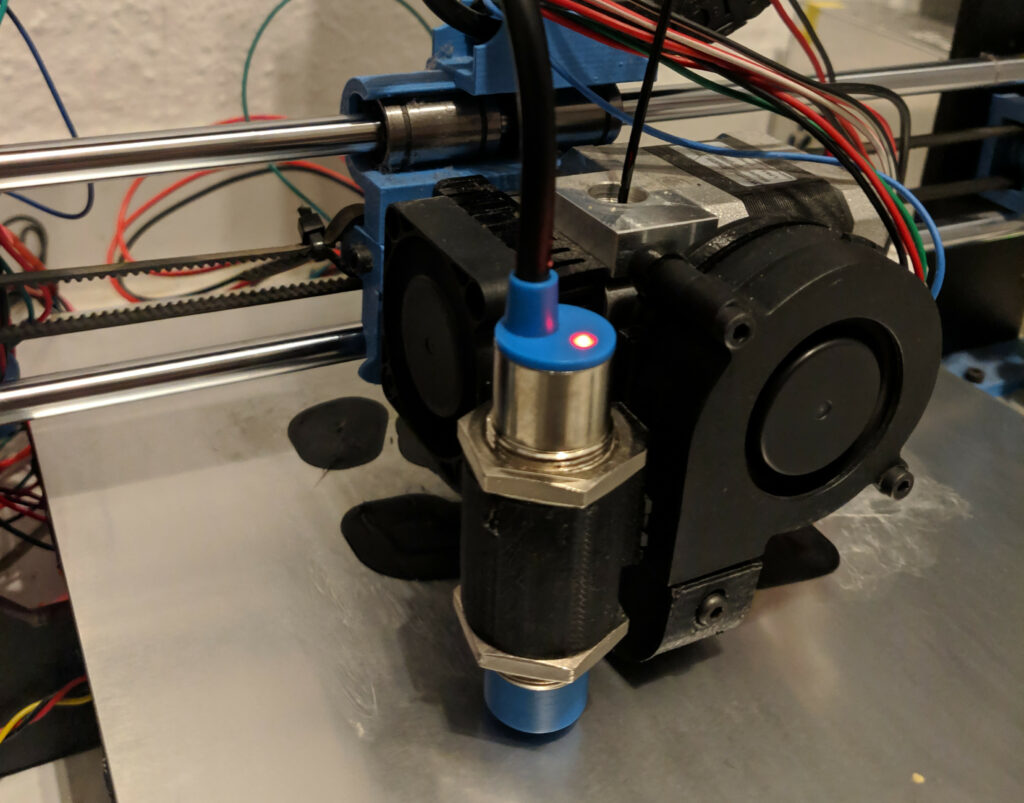
In the last post about reactivating my 3D printer I stopped at installing the new inductive sensor.

After installing I tried it with my glass plate but that didn’t work very well so I removed the glass plate.

I struggled with the auto leveling tutorial mentioned in the last post, because the marlin firmware evolved quite a bit since then and I couldn’t find all those options mentioned in the tutorial. Basically I followed step 1 and skipped the rest.

The changes from my previous Configuration.h to the new one with auto leveling configured are (uncommented lines):
#define Z_MIN_PROBE_USES_Z_MIN_ENDSTOP_PIN
#define USE_PROBE_FOR_Z_HOMING
#define NOZZLE_TO_PROBE_OFFSET { -30, -30, -1 } (the nozzle offset is -30mm x-wise, -30mm y-wise and -1 z-wise)
#define PROBING_MARGIN 30 (increased from 10 to 30 because the bed leveling stopped/failed when the probe was almost outside the aluminium bed)
#define AUTO_BED_LEVELING_UBL
#define RESTORE_LEVELING_AFTER_G28
#define Z_SAFE_HOMING
#define EEPROM_SETTINGS

After it compiled successfully I followed the guide from marlin:

M502            ; Reset settings to configuration defaults...
M500            ; ...and Save to EEPROM. Use this on a new install.
G28             ; Home XYZ.
G29 P1          ; Do automated probing of the bed.
G29 P3 T        ; Repeat until all mesh points are filled in.
G29 F 10.0      ; Set Fade Height for correction at 10.0 mm.
G29 A           ; Activate the UBL System.
M500            ; Save current setup. WARNING: UBL will be active at power up, before any [`G28`](/docs/gcode/G028.html).

My new sensor at work 🙂

How to make a full adb backup with a broken android phone screen

With a broken screen and not a absolutely up to date backup I wanted a complete backup with everything to the latest.
I was able to unlock my phone with my fingerprint but couldn’t see anything besides a black screen.
Searching for a tool to backup I found a blog post that helped a lot because I also wanted to use Titanium Backup to restore apps and other data. The command is:
.\adb.exe backup -f FullBackup.ab -apk -all
(oh my, am I happy to have usb debugging enabled already)

Update 2019-07-28:
Not that easy with the adb Backup. The restore didn’t work with the backup I made above.
Searching for answers I found a post on stackoverflow that explains a bit more on how to verify a adb backup. I haven’t tried it and my backup is encrypted so I propably should try https://github.com/nelenkov/android-backup-extractor
https://lyubomyr-shaydariv.github.io/posts/2016-08-27-when-android-backup-and-restore-tools-may-fail/
Also Titanium Backup didn’t work. Fuck Android and their backup/restore capabilities.

My phone is encrypted so the adb command asked on my phone for a password to encrypt my backup. I could enter the password with the command
.\adb.exe shell input text <password>
and selecting the „start backup“ button with two tabs:
.\adb.exe shell input keyevent 61
and finally „press“ enter with:
.\adb.exe shell input keyevent 66
(more keyevents can be found here)

Later I found a java tool called AndroidScreencast that allowed with the help of adb to connect to my phone and cast my screen to a small window where I could use my mouse and keyboard to navigate 🙂

Install Arch on OrangePi Plus 2e

There is already a howto on how to install Arch on a Orange Pi One.
The only difference for me was to compile it with another OrangePi defconfig and toolchain with hardware float (apt-get install gcc-arm-linux-gnueabihf).
You can find the appropriate defconf for your OrangePi here.
The config for u-boot looks like:

make -j4 ARCH=arm CROSS_COMPILE=arm-linux-gnueabihf- orangepi_plus2e_defconfig
make -j4 ARCH=arm CROSS_COMPILE=arm-linux-gnueabihf-

The only thing that didn’t work was the wifi adapter. I found an aur repository for the kernel module. It uses the same git repo as this howto.

After the restart the right kernel module was loaded and wifi worked, yeeeehaaaa 🙂
More information about the OrangePi Plus 2E.

compile a cuda program with gcc-6

If one experiences this example message while compiling:

/usr/local/cuda/include/crt/host_config.h:119:2: error: #error -- unsupported GNU version! gcc versions later than 6 are not supported!
 #error -- unsupported GNU version! gcc versions later than 6 are not supported!
  ^~~~~

Try the flag CUDA_NVCC_FLAGS and set the gcc compiler to version 6:
cmake -D CUDA_NVCC_FLAGS="-ccbin gcc-6" .. && make

awk script to remove objects from a pdf

First uncompress the pdf if it is compressed with pdftk:
pdftk myfile.pdf output unc.pdf uncompress

Then remove all objects that contain the keywords PDF-XChange|pdfxviewer.com|PDFXCViewer20|Click to buy NOW:

awk '
    BEGIN {
        found=0
    }
    {
    if ( $0 ~ /^[0-9 ]+obj/ ) {
        objectFound=1;
        objectLineCounter=0;
        objektZeilen[objectLineCounter]=$0;
        objectLineCounter++;
    } else if (objectFound == 1) {
        objektZeilen[objectLineCounter]=$0;
        if ( $0 ~ /PDF-XChange|pdfxviewer.com|PDFXCViewer20|Click to buy NOW/ ) {
            found=1;
        }
        if ( ( $0 ~ /endobj/ ) && ( found == 0 ) ) {
            for (i=0; i<length(objektZeilen); i++) {
                print objektZeilen[i];
            }
            delete objektZeilen;
            objectFound=0;
            found=0;
        }
        if ( ( $0 ~ /endobj/ ) && ( found == 1 ) ) {
            delete objektZeilen;
            objectFound=0;
            found=0;
        }
        objectLineCounter++;
    } else {
        print $0
    }
    }
' unc.pdf > test.pdf

Recompress and repair pdf with pdftk:
pdftk test.pdf output comp.pdf compress

Too bad it also removed the OCR layer. I couldn’t find out which layer is responsible for the OCR.

extract all rars in all subdirectories with find

Findet alle multipart rars in allen subdirectories von . außer dir1 und dir2 und entpackt in dem Ordner die Dateien.


find . \( -path "./dir1" -o -path "./dir2" \) -prune -o -name '*.r00' -execdir unrar x {} \;

Wenn schon Dateien vorhanden sind, die nicht überschrieben werden sollen:


find . \( -path "./_GameRetroPacks" -o -path "./_Konsol" \) -prune -o -name '*.r00' -execdir bash -c "echo E | unrar x {}" \;

Löschen aller Rardateien in allen Unterordnern:


find . -regextype posix-extended -iregex ".+\.r[0-9ar]{2}" -exec rm {} \;

Create a guest WLAN with OpenWrt

It’s enough to do it like this tutorial says:
https://wiki.openwrt.org/doc/recipes/guest-wlan-webinterface

If you want a log of the surfing history for maybe avoid being held responsibly for the things your guest does (Störerhaftung) you can log the DNS queries:
https://superuser.com/questions/632898/how-to-log-all-dns-requests-made-through-openwrt-router/897413#897413

Now you need a rsyslog server that collects those logs:
https://kimkil.nietsniehu.net/raspberry-pi-as-a-log-server-with-rsyslog-2/

Ubuntu and a custom build zfs and spl from git

I wanted to try the 0.7.0-rc3 from git. So I cloned from git and changed to the zfs and spl version 0.7.0-rc3 tag.

Since ubuntu ships with a prebuilt zfs and spl my custom packages didn’t work.
It always loaded the prebuilt zfs and spl from the kernel modules directory but not the one I built.
I figured out a way to make it work nonetheless.

– check your currently running zfs module:

# modinfo zfs
filename:       /lib/modules/4.8.0-41-generic/kernel/zfs/zfs/zfs.ko
version:        0.6.5.8-0ubuntu4.1

– remove kernel mods (make sure to have all zfs pools unmounted, otherwise it will fail):

rmmod zfs zunicode zcommon znvpair spl zavl

– remove kernel module from your current running kernel:

rm -r /lib/modules/$(uname -r)/kernel/zfs

– build deb packages for your currently running ubuntu (see their wiki):

cd $where_your_spl_from_git_resides
make clean; ./autogen.sh
cd $where_your_zfs_from_git_resides
make clean; ./autogen.sh
cd $where_your_spl_from_git_resides
./configure; make deb
for file in *.deb; do gdebi -q --non-interactive $file; done
cd $where_your_zfs_from_git_resides
./configure; make deb
for file in *.deb; do gdebi -q --non-interactive $file; done

– do a modprobe:

modprobe zfs

– check again the running zfs module:

# modinfo zfs | head -2
filename:       /lib/modules/4.8.0-41-generic/extra/zfs/zfs/zfs.ko
version:        0.7.0-rc3

After that it worked just well. I guess it has to be done for every new kernel release. If there is another better way instead of deleting modules from the kernel modules directory to make it work, please share.

PulseAudio erlaubt es nicht das Audio Ausgabegerät zu wechseln

Vielleicht liegt es am pavucontrol, dass nicht umgeschaltet werden kann. Nach ein wenig googeln findet man Kommandos, wie man die Audioausgabe über Konsole abändern kann.
pacmd move-sink-input 2 1 ging nicht. Fehler ist „Moved failed.“
Weiterer Details verrät:

hamster@hamsterkaefig:~$ pacmd list-sink-inputs
1 sink input(s) available.
    index: 2
  driver: <protocol-native.c>
  flags: DONT_MOVE START_CORKED FIX_RATE 
  state: RUNNING
  sink: 2 <alsa_output.pci-0000_00_14.2.analog-stereo>
  volume: front-left: 65536 / 100% / 0,00 dB,   front-right: 65536 / 100% / 0,00 dB
          balance 0,00
  muted: no
  current latency: 50,91 ms
  requested latency: 23,22 ms
  sample spec: float32le 2ch 44100Hz
  channel map: front-left,front-right
               Stereo
  resample method: copy
  module: 14
  client: 14 <Tropico5>
  properties:
    media.role = hex:
    phonon.streamid = hex:
    media.name = "Playback Stream"
    application.name = "Tropico5"
    native-protocol.peer = "UNIX socket client"
    native-protocol.version = "31"
    application.process.id = "30530"
    application.process.user = "hamster"
    application.process.host = "hamsterkaefig"
    application.process.binary = "Tropico5"
    window.x11.display = ":0.0"
    application.language = "de_DE.UTF-8"
    application.process.machine_id = "96177112fcaef6926d04e5b80000002e"
    application.process.session_id = "c2"
    module-stream-restore.id = "sink-input-by-application-name:Tropico5"

Dort steht bei flags: "DONT_MOVE"
Danach gegoogelt findet man die Lösung z.B. hier und hier

Man erstellt eine Datei im eigenen Home namens .alsoftrc mit Inhalt:

[pulse]
allow-moves=yes